Ghosting is one of the more common problems encountered in FDM 3D printing. The effects of ghosting may seem subtle at first but are unmistakably prominent if kept unchecked. Although a project with ghosting will still be printed to completion, the quality of the finished product will be very poor.
What exactly is ghosting and what are its signs? What causes ghosting and how can you keep it from happening?
What is ghosting?

Ghosting is a 3D printing error that is also called by other names – ringing, echoing, or rippling. In any case, the signs of ghosting are easy to spot. They typically manifest as features of the model reappearing in places where they should not be. These repeating features are fainter, making them appear ghost-like, thus the term.
Ghosting does not constitute a catastrophic failure of a print, but its effects will likely be prominent for the entire model. They are most visible in parts of the model that have sharp edges and very fine details. If you want your 3D printing project to look nice enough to be professionally made, then ghosting effects are just unacceptable.
What causes ghosting?
In a nutshell, ghosting is caused by excessive movement of the printhead during printing. When the printhead moves to the target position as directed by the G-Code, it may miss the target due to a number of different reasons. When this happens, the printhead extrudes the filament in the wrong location, creating the ghosting effect.
Excess movement of the printhead is mainly caused by uncontrolled vibrations. This can be due to very demanding slicer settings, such as very high print speeds or acceleration settings. It can also be caused by hardware problems, such as improper setup, loose screws, or inadequate belt tension. It is also because of this phenomenon that ghosting becomes more obvious when the print head has to negotiate sharp corners.
How to prevent ghosting in 3D printing
Whatever the cause may be, ghosting is a fairly simple problem to address. You either have to dial in the proper slicer settings or do adjustments to your hardware that should be part of regular maintenance. Here are the steps you can take to prevent ghosting, in order of increasing complexity:
Tighten screws
The first and easiest thing you can do is to take your screwdriver and check that all the screws of your 3D printer are as properly tightened. This routine check is something that you should be doing regularly.
Check the stability of the printer

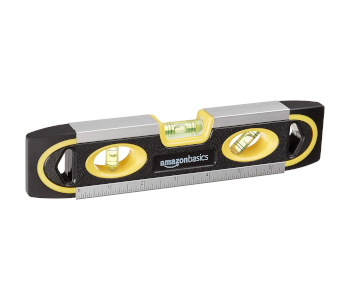
Depending on how your 3D printer was set up, its position and the surface it is resting on may be contributing to excess vibration. Using a spirit level, check if the frame of your 3D printer is perfectly leveled. You will also want to place it on a surface or table that does not wobble at all. The most foolproof solution to this potential problem would be to place your 3D printer atop a set of vibration dampeners.
Check the belt tension

The belts running through the print head and the stepper motors play a huge role in ensuring that the print head does not stray from its intended location. For best results, you will want to ensure that these belts are sufficiently taut. The problem is that belt tension tends to naturally deteriorate over time, which means you will have to adjust it periodically.
The usual rule of thumb is that the belts should move only very slightly when you flick it with a finger. Any looser than this and the belt needs to be tightened. Some 3D printers come with belt tension adjusters but you can also just 3D print your own.
Adjust speed, acceleration, and jerk settings

If you’re sure that there is nothing wrong with your hardware, then there must be something that can be improved with your slicer settings. You can only typically reduce the printing speed using the slicer, so just reduce this setting to the minimum that is recommended for your filament
Changing acceleration and jerk settings is a little more complicated, as these are typically stored in the EEPROM settings. Accessing these settings using special commands may vary from one 3D printer to another, so consult your manual or manufacturer.
You will want to make sure that your acceleration is set to below 5000 mm/s2 and your jerk is set to below 30 mm/s. If you are still having a problem with settings within this range, then reduce the value by about 20% and do a test print.
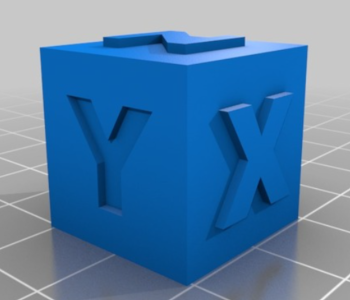
After making the adjustments, you will want to do a basic test print. There are several models that are designed specifically to check for ghosting effects, such as these basic cube and embossed face designs. These are small and simple models with sharp edges that you can 3D print in just a few minutes.
Final thoughts
Ghosting is not exactly the type of 3D printing problem that will make you completely cut an ongoing project short, but it can be quite annoying if you’re after perfect aesthetics. The good news is that it’s a fairly simple problem to address. Just doing regular maintenance of your 3D printer and making sure that it has been set up properly might be enough for you to never have to deal with ghosting.
The post What is Ghosting in 3D Printing? appeared first on 3D Insider.


Leave a Comment